Windscreen Construction

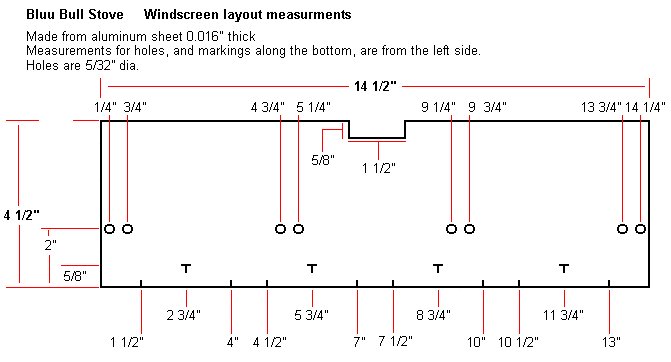
The windscreen, for the BluuBull Stove, is made from a sheet of aluminum 0.016" thick.
The aluminum can be ordered from McMaster car.
The smallest quantity the last time I checked was a 50 foot roll 6 inches wide for about $29.00.
It can also be ordered from the BluuBull order page by the foot (6 inches wide).
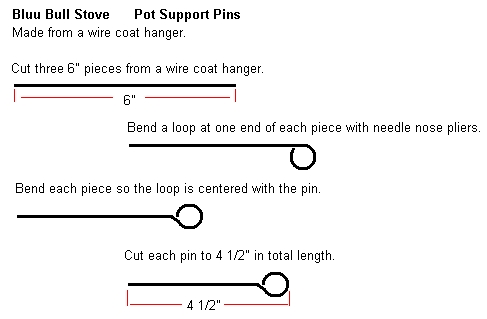
The pins are made from a standard wire coat hanger.
Layout Drawings
It may be helpful to print these drawings for reference during construction.
Quick Note
The best efficiency for the BluuBull Burner is with the pot 3/4" to 7/8" above the top of the burner. This is something to consider if designing your own pot support. TheBluu Bull Stove’s burner is 1 1/4" tall. The holes for the pot support pins are 2" from the bottom. That sets the pot 3/4" above the burner.
What you need to make your own
Tools
-
Straight edge about 15" long
-
18" ruler to measure, mark, etc.
The ruler can be used as the straight edge
-
Fine tip Permanent marker
A fine point Sharpie works well
-
Utility Knife
-
Scissors
-
Drill
-
5/32" drill bit
-
Tube of caulk
A used tube is fine.
The tube is only used as a form to shape the windscreen.
-
Lineman pliers or large pair of wire cutters
-
Wire wheel on a grinder
If a grinder with a wire wheel is not available sand paper can be substituted.
-
Safety Glasses
Materials
-
Aluminum 0.016" thick
Needs to be at least 14 1/2" by 4 1/2".
-
Wire coat hanger
Construction Instructions
-
Cut a piece of aluminum to 14 1/2" by 4 1/2"
To cut the aluminum, place a straight edge along the line to be cut, then use a utility knife to score the aluminum along the straight edge.
Make three or four passes with the utility knife. The aluminum can then be bent back and forth along the line a few times to be broken off.
This is much easier than using scissors, and results in a cleaner cut.
-
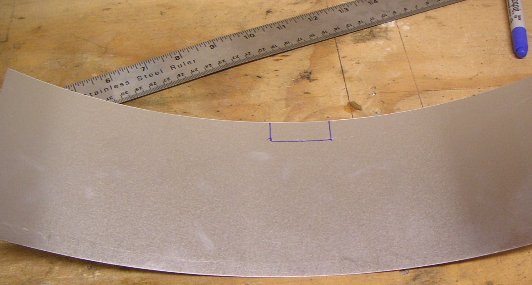
Mark an area at the center of the top edge, 5/8" high and 1 ½" wide.
A permanent marker with a fine tip (fine tip Sharpie) works well for marking on the aluminum.
-
Cut out the area from step 2. The notch created provides a space for the pot handles.
The sides of the notch can be cut with scissors. The bottom line of the notch can then be cut with a straight edge and utility knife and broke out.

-
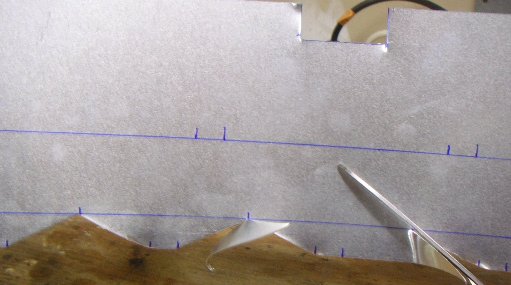
Draw a line lengthwise across the windscreen 2" from the bottom.
-
Mark points on the line from step 4 at:
1/4", 3/4", 4 3/4", 5 1/4", 9 1/4", 9 3/4", 13 3/4" and, 14 1/4" from the left.
These marks are where holes will be drilled for the pot support pins.
-
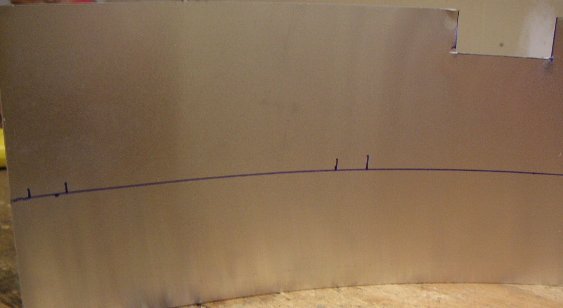
Draw a line lengthwise across the windscreen 5/8" from the bottom.
-
Mark points on the line from step 6 at:
2 3/4", 5 3/4", 8 3/4" and, 11 3/4" from the left.
-
Mark points along the bottom at:
1 1/2", 4" 4 1/2", 7" 7 1/2", 10" 10 1/2" and, 13" from the left.
-
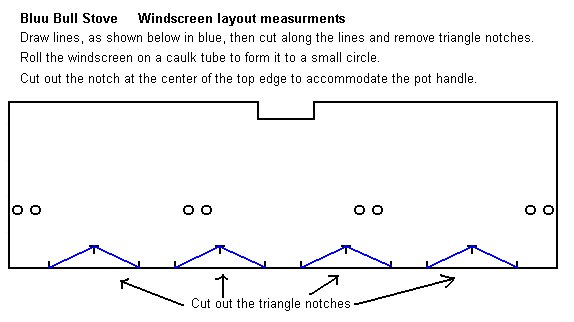
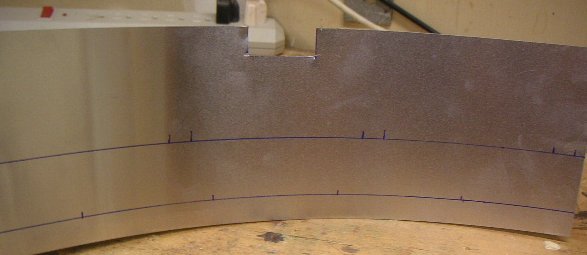
Cut triangle notches along the bottom, using the marks from steps 6-8 as guides.
Scissors are used for these cuts.
The drawing for the windscreen layout shows the triangle cut outs with blue lines.
-
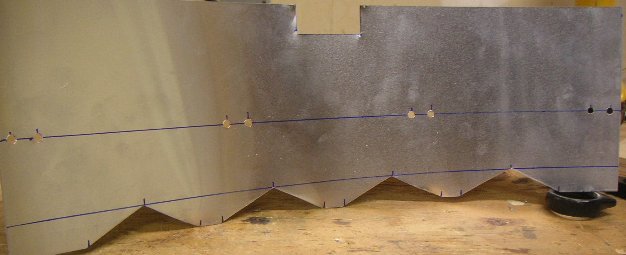
Drill 5/32" holes at the marks from step 5.
-
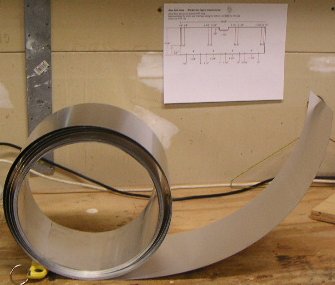
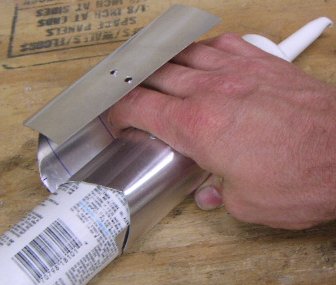
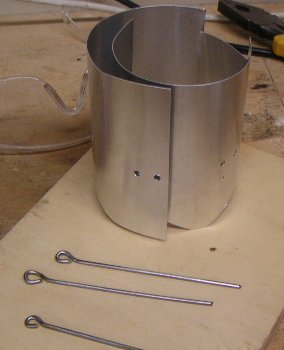
Roll the screen length wise on a tube of caulk.
This will from the windscreen to a small diameter allowing it to fit inside the pot.
-
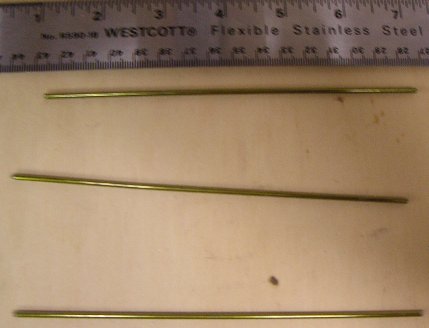
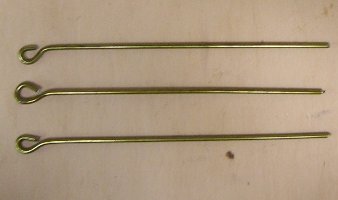
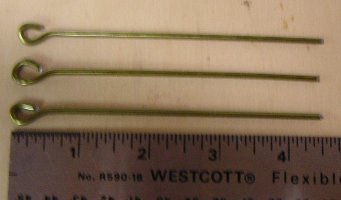
Cut 3 straight pieces from a wire coat hanger 6" long for the pot support pins.
A pair of lineman pliers or a large pair of wire cutters should cut the hanger easily.
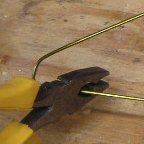
-
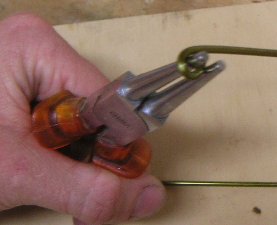
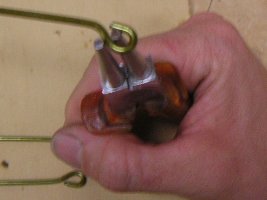
Use a pair of needle nose pliers to bend a small loop in one end of each pin.
-
Bend each pin so the loop is centered on the pin.
See the layout drawing.
-
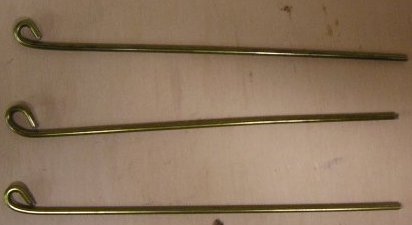
Cut each pin so it has a total length of 4 1/2".
-
Use a wire wheel on a grinder to brush off the enamel on the pins.
Sand paper can be used as well, it just takes more time and effort.
If left on, the enamel would leave soot on the pan when the BluuBull Stove is used the first few times.

USE SAFETY GLASSES WHEN USING THE WIRE WHEEL.
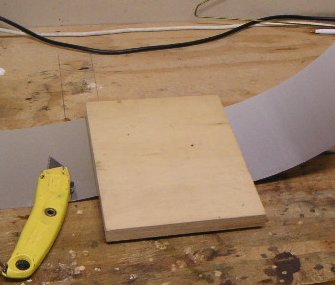
The windscreen and pins should look like this.
Use denatured alcohol to clean off the marks created while making the windscreen.