Burner Construction
|
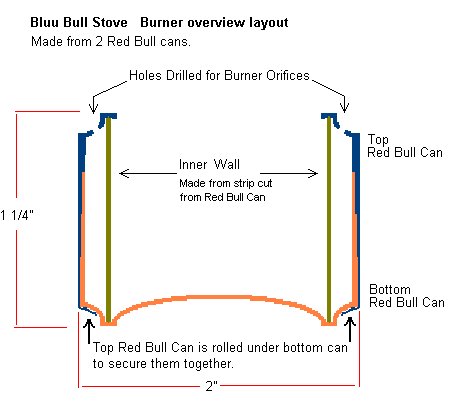
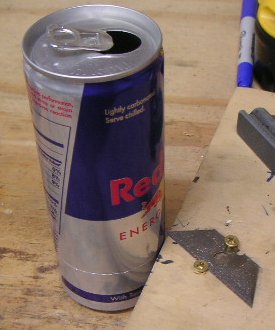
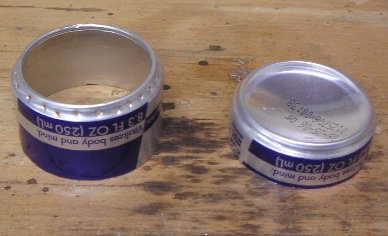
The burner, for the BluuBull Stove, is made from 2 Red Bull cans.
You can make your own, or order one from the BluuBull Stove order page.
|
Lay out drawings
What you need to make your own
Tools
-
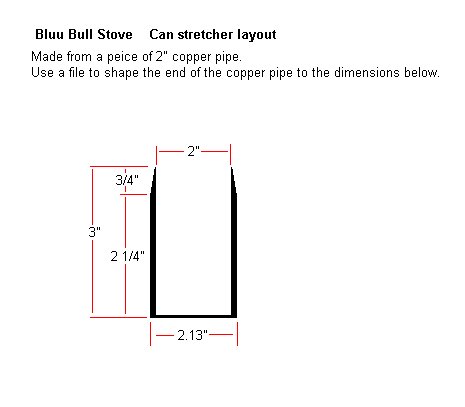
Can stretcher
-
Made from a piece of 2" diameter copper pipe 3 1/2" long
The end was filed to a cone shape.
The tip has a 2" outside diameter.
3/4" from the tip the diameter is 2.125"
See the drawing of this tool in the lay out drawings above.
-
Utility Knife
-
Utility Knife Blade (an extra one)
-
3/4" plywood 6" X 6"
-
1/2" plywood 6" X 6"
-
Ruler (18")
-
Scissors
-
Thumb Tack
-
The kind you can hold on to not the kind with a flat head.
-
Caulk Tube (used is ok, contents not used)
-
Wire Wheel on a Grinder (sand paper can be used instead)
-
Dremel with cut off wheel (optional)
-
Metal Stamp set with letters and numbers (optional)
Materials
Making the burner can be difficult.
A few cans may be ruined before getting the hang of it.
But if you like drinking Red Bull......Wooo Hooo.
Construction Instructions
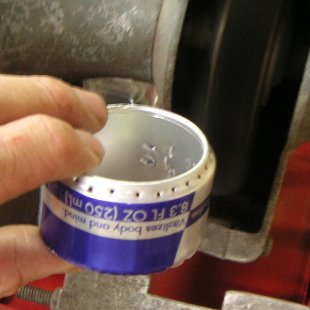
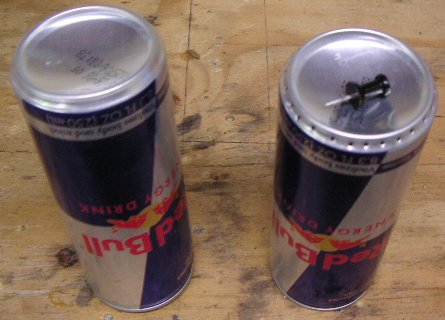
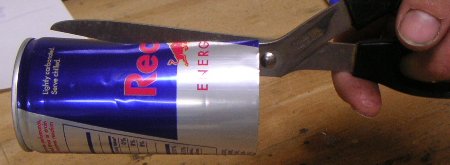
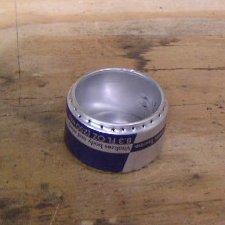
2 Red Bull cans are used.
One can will be referred to as the “Top Can" and the other will be referred to as the “Bottom Can".
-
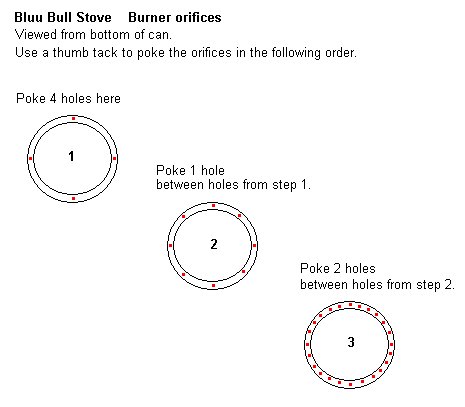
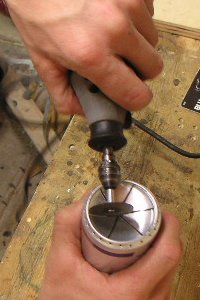
Poke 24 holes in the top Can to make the burner orifices. The holes are made in the concave area between the side of the can and the lip on the bottom of the can. If the holes are made in the order shown in the layout drawings, no measurements are needed.
-
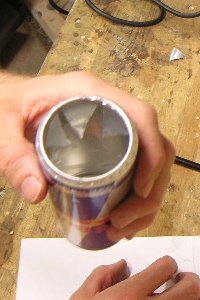
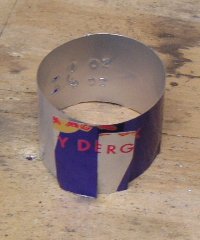
Cut out the large concave section on the bottom of the Top Can. Use the utility knife to score around the area to be cut. Score all the way around a few times to ensure a deep score. Use a Dremel tool, with a cut off wheel, to cut the area into sections. Each section can then be pushed in and out to be broken off. If a Dremel tool is not available, continue scoring with the utility knife until the section is cut out.
-
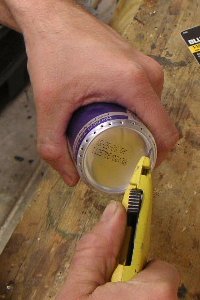
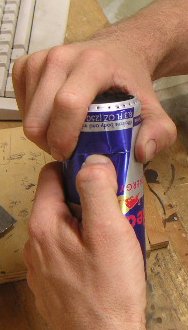
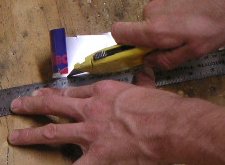
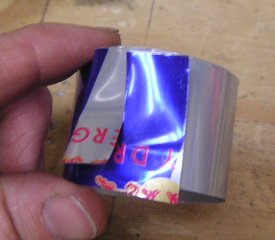
Cut the Top Can off 1 1/4" from the bottom. Stack the ½" and ¾" pieces of plywood. Mount the spare utility knife blade to the 3/4" plywood (use wood screws), with the tip hanging off the edge about 1/8". Set the can next to the wood and spin it along the tip of the blade to score the can where it will be cut. Use light pressure when scoring the can. Continue spinning the can until the blade starts to poke all the way through the can. If too much pressure is used the blade will poke through the can before a good score is made along the can, making the next step difficult.
-
Use a fingernail to push on the scored line, where the blade poked all the way through. The can will tear along the scored line. Work all the way around the can to finish the cut.
-
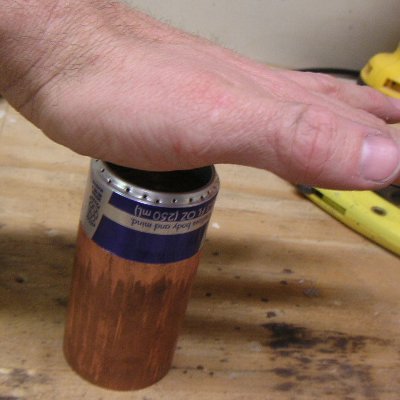
Place the Top Can on the can stretching tool and smack it down on to the tool with the palm of your hand. The cone shape will stretch the can so it will be able to fit over the lower can of the burner. Several hits will be required to stretch the can enough. If the can is hit too hard or too many times it will rip. If the can is not
hit it hard enough or too few times, it will not fit over the lower can.
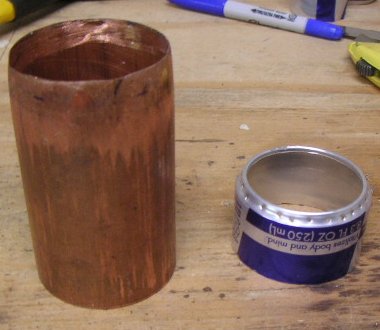
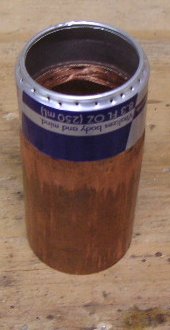
To remove the can from the stretcher use the caulk tube.
Slide the caulk tube through the stretcher until it hits the can. Strike the can with the tube until the can pops off the stretcher.
-
Cut the Bottom Can off 3/4" from the bottom using the method from steps 3 and 4. The only difference is the 1/2" piece of plywood is removed. Only the 3/4" piece of plywood is used.
-
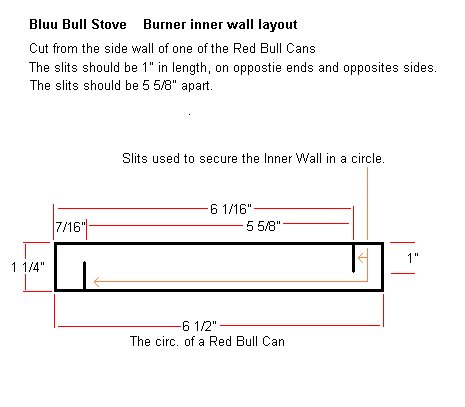
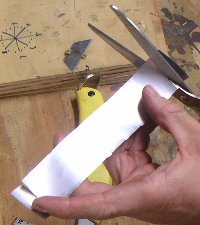
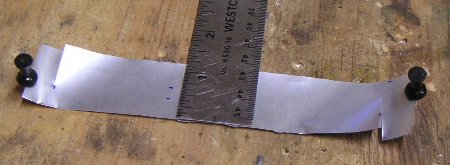
A strip needs to be cut for the Center Wall. Cut a piece out of one of the scraps from either can 1 1/4" wide and 6 1/2" long. The circumference of the can is 6 1/2". Cut up the side of the can, all the way to the top, with scissors. Then cut around the can near the top. Lay the piece on the work bench and use the ruler and utility knife to cut it 1 1/4" from the line created when the can was cut off in steps 3 and 4.
-
Cut slits in the ends of the Center Wall as shown in the drawings, 5 5/8" apart. Marks for the slits can be measured at 7/16" and 6 1/16" from one end. Use scissors to cut the slits. The slits should be 1" long.
-
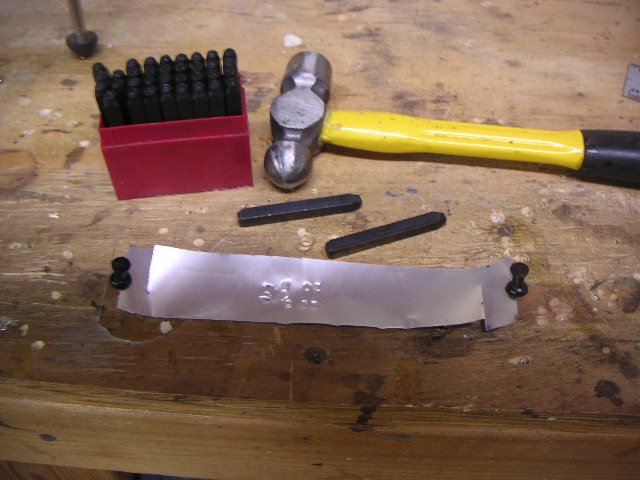
If 1/2 oz. and 1oz. markings are desired in the burner, now is the time to make them. From the bottom of the center wall make a mark at 7/16" for 1/2 oz. and a mark at 11/16" for 1oz. Use a metal stamp set to make the marks. If there are any other markings desired inside the stove, make them now.
-
Fold the Center Wall in a circle and slide the slits from step 8 into each other. The pictures show the ends by the slits bent out. DO NOT DO THIS. The ends in the picture were bent to clearly show how to put it together in the picture. The ends should be kept as straight as possible to make assembly easier.
-
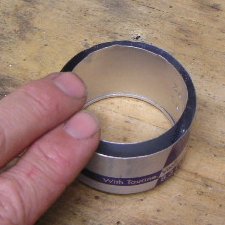
Check to see that the Bottom Can fits just inside the Top Can. If it does not put the Top Can back on the Stretcher and stretch it a bit more.

-
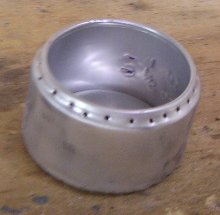
Place the Top Can upside down on the work bench. Set the Center Wall inside the Top Can. Make sure the numbers stamped in the Center wall in step 9 are upside down. The Center wall should fit inside a natural track in the Top Can.
-
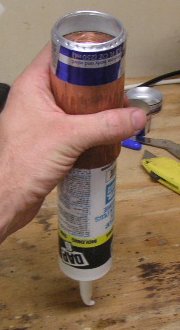
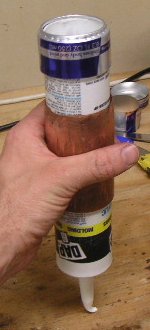
Place the Bottom Can over the Center Wall and inside the Top Can. Position it as the picture shows in step 11. Use the palm of your hand to gently and firmly press the can together until the Center Wall stops further movement by resting in the race way of the Top and Bottom Cans. When pushing the cans together keep the pressure even so the cans stay aligned straight while being pressed together.
-
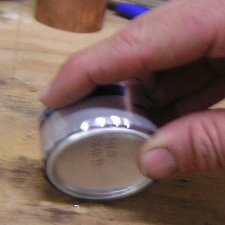
The edge of the Top Can needs to be rolled along the bottom of the burner to keep it from coming apart. Roll the can on an angle along the work bench to fold the edge along the bottom of the burner.
-
Use a wire wheel on a grinder to clean the paint from the outside of the burner. If a wire wheel is not available, sand paper can be used instead.