Before using the BluuBull Stove, please check out the Safety page.
Location, location, location.
Find a spot to use the BluuBull Stove, that is flat, level, and free of flammable materials.
The pictures in these instructions, show the BluuBull Stove being used on my kitchen counter. This is not
recommended.
Windscreen / pot support set up.
The windscreen / pot support will be referred to as the windscreen for simplicity.
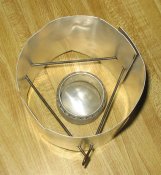
Take the windscreen from the pot and spread it open until the ends over lap 1". The ends should overlap allowing both holes, on each of the ends, to line up with each other. Insert the pot support pins into the holes in the windscreen. Each pin should occupy 2 of the 6 holes, forming a triangle in the center of the windscreen. The triangle formed by the pins, is the pot support.
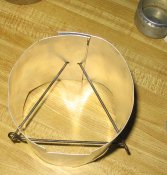
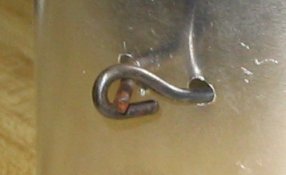
Each pin has a loop at the end of it. The straight end of the second pin should go through the loop of the first pin, after being inserted through the windscreen. The straight end of the third pin should go through the loop of the second pin, after being inserted in the windscreen. Inserting the pins through the loops helps to lock the pins in place.
Set it up with no fuel to check for stability.
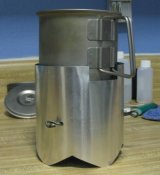
Set the burner down, then the windscreen over the burner. Set the pot on the pot support, to be sure it is stable enough to cook in. Remove the pot and windscreen, to allow fuel to be added to the burner.
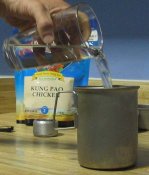
Add fuel.
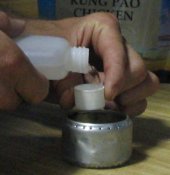
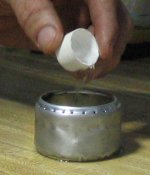
Add enough fuel (denatured alcohol) to the burner to cook your food. Fuel is added by pouring it into the large center opening in the stove.
You will find the method of adding fuel that works best for you. One suggestion is to pour fuel into the cap of the fuel bottle, then dump it into the stove. Counting caps of fuel can help estimate cook time. The ½ oz and 1 oz markings on the inside of the burner should help judge the amount of fuel being added. Over time you will get used to how much fuel is needed.
Since the stove is very difficult to extinguish, any extra fuel added will need to burn off. If insufficient fuel was added the stove will die out before cooking is complete.
DO NOT add fuel to the BluuBull Stove while it is burning. Be sure the burner has died out and the stove has cooled for a couple minutes before adding more fuel. Adding fuel to a hot or burning stove could result in serious burns. Burns are a sure fire way to take the joy out of any trip.
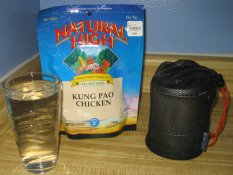
Put the food or water in the pot before lighting the stove.
Before lighting the stove, get your food or water in the pot, so it can start heating up as soon as the stove is ready to conserve fuel.
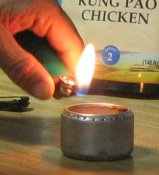
Time for the fun part, Fire!
Use a lighter or match to light the stove. Get the flame near the surface of the fuel in the center of the burner. When the fire is lit move your hand away quickly to reduce the risk of burns. The flame produced from denatured alcohol is very difficult to see in bright day light. Don’t hold the flame to the stove and wait to see flames appear. When the stove lights a faint "poof" is heard. That’s your cue to pull your hand away.
Set the windscreen back over the burner, situated in the same stable position from step 3. Do not put the pot on the supports yet.
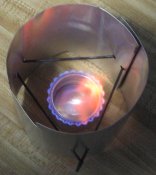
Warm up.
The stove needs to be warmed up to function properly. Once the stove is lit, let it burn for 30 or 40 seconds before setting the pot on the pot support. This gives the burner a chance to start pushing vapor out the burner orifices, and ignite the vapor to flames. If the pot is set on the support to soon, the burner may die out. When the flames look like the flames in the second picture in step 6 the burner is warmed up.
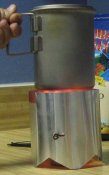
To increase efficiency, and decrease the amount of fuel needed, hold the pot, by hand, just above the top of the wind screen, while the burner is warming up. The rising heat will start warming your meal, while the pot is held high enough to allow sufficient air flow for the burner to warm up. Once flames are coming from the burner orifices, the pot can be set on the pot support.
The amount of time for the burner to ignite the vapor coming from all the burner orifices will vary. It may be as little as 10 seconds or as long as a minute, but is normally about 20 or 30 seconds. Things that can effect warm up time are altitude, ambient temperature, wind, fuel temperature, fuel level, etc.
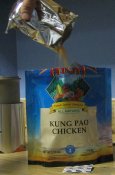
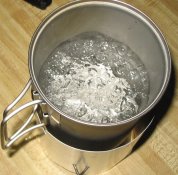
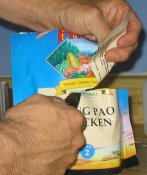
Boil the water and prep the meal......(this section is for freeze-dried meals)
While the water is boiling open the freeze-dried meal package and prepare according to it's instructions, (Open the bags inside and empty into the main pouch and remove the oxygen absorber).
When the water is boiling, pour it into the freeze-dried meal pouch.
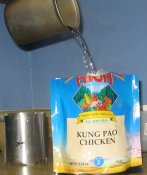
Stir the water and the meal contents thoroughly. Make sure all the food is mixed well with the water, including the corners. Then seal the pouch
with the zip lock style seal at the top. Let the meal sit for 7 to 10 minutes, so it can absorb the water to give it a pleasant texture.

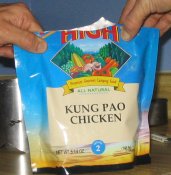
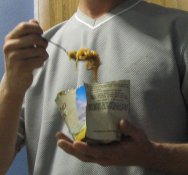
Just before eating, I prefer to cut the pouch down so that it extends only a short distance over the top of the food. It helps keep things clean while eating. Grab your spoon and dig in!

Cool down and put away.
The stove will die out when the fuel is exhausted. Let the stove cool down before handling it, adding more fuel to it, or putting it away. After the stove has cooled, everything can be put back in the pot for storage.
If using freeze-dried meals, no pot clean up is needed. The burner will cool in about a minute. I like the inside of my pot to be completely dry before packing everything back into it. To speed up dry time, a small amount of fuel can be added to the burner and lit. Hold the pot over the burner to boil away any left over water that could not be poured out. Let the burner cool again before putting everything away.
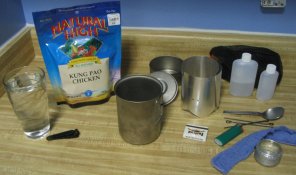
The set up page shows the recommended way to get everything in the pot. Some may have different items (fuel bottles, spoon etc.) than the ones I use, so the pack up instructions are not included here.
Other camp stoves I have used leave a black soot on just about everything including the stove it self. One of the advantages of denatured alcohol is it burns very clean. There is no need to clean the burner, pot, or wind screen / pot support. The inside of the pot may need to be cleaned, depending on what you cook.
If you are one who does not like the idea of doing dishes, freeze-dried foods are a good idea. Water is boiled in the pot, then poured into the pouch the freeze-dried meal came packaged in. The pouch, the meal came in, becomes the bowl for your meal. The stove leaves no residue on anything and the pot was used only for boiling water. Boiling water leaves a pretty clean pot behind. After eating, the stove and pot have cooled off and only need to be dried and put away. The pouch is put in your trash bag.
I have tried Mountain House freeze-dried meals and feel the taste is not satisfactory. Natural High freeze-dried foods however are great. The taste of Natural High is good enough you could serve it at home, and no one would think it was odd tasting.
Not only do freeze-dried meals help with clean up, they also help keep the areas you visit cleaner. If you cook other foods and need to clean the pot, small amounts of food are left in the cleaning water. The water is dumped somewhere, and the food particles go with it. Some areas are very sensitive to waste. Check with local authorities if you do not know how food or human waste should be handled.
Some feel that the small amounts of food left behind are not enough to cause problems. This may or may not be the case, but I feel it to be a moral issue as well. Man uses the planet in many ways; roads, cars, houses, factories, etc. you get the idea. All the things we enjoy in life were taken from the earth, and many have negative effects on the earth. When visiting areas that are not over run with human activity, efforts should be taken to minimize our impact - as much as possible. Man gets a lot of use out of the earth already, let's not mess up everything we touch.
Ok, that is the end of the environmental rant.