Canyoneering Route Description
Ice Box Canyon - 3A(B) III
Red Rock Canyon, Nevada.
10-07-07, 3 people, 1 Day (Travel time in route 10.5 hours) .

Time Required - 8 to 10 hours
Distance - 2.7 miles Total, 200 feet Technical
Rappels - 2 Rappels, Longest Rappel 160 feet.
Elevation Range - 4290 - 5350 Feet
Shuttle Required - No Vehicle -
Passenger
Permit Required - No
Rappelling and anchor gear, Ropes and or pull cords for rappels up
to 160 feet and 50 feet of 1 inch webbing for sling placement. If
the fall is only trickling and it is a HOT day no wet suit is
needed. The pool that needs to be crossed to get to the final
rappel can be quite chilly and full even in mild weather with little
water flow, that is why a wet suit is still recommended.
Ice Box canyon is located in the Red Rock Canyon National
Conservation Area near Las Vegas Nevada. A popular hike goes
up the bottom of Ice Box Canyon and ends at the bottom of a 160 foot
water fall. Spring snow melt can result in a lot of water flowing
over this water fall but the rest of the year water flow is
minimal. The hike up the wash in the canyon up to the bottom of the
water fall, is a popular hike in Red Rock. When there is
significant water flow this water fall is a beautiful hike
destination.
There is a canyoneering route for the entire Ice Box Canyon.
That route uses most of the same approach as the route to
Ice
Cube Canyon, then down Ice Box Canyon down to and over the water
fall then out to the trail head via the standard hiking trail. That
is not the route covered here.
This "alternate route" starts at the trailhead and soon climbs up
the right (north) side of the canyon then drops back to the canyon
floor just above the large water fall. Very little of the actual
Ice Box Canyon Canyoneering route is followed for this route.
This alternate route to do only the lower water fall, shows and
describes the route for only the fun part. This alternate
route for Ice Box Canyon does not mess with the long approach and not
so challenging canyon of doing the full route. We have hiked
all the way up Ice Box canyon with no gear. The upper part of
the canyon does not feel like it would be interesting to descend as
a canyoneering route.
This Alternate route involves a lot more work than some may
think it is worth. Most of the approach route involves a lot
of scrambling and light climbing. The payoff is rapping down a
water fall that is about 160 feet. Because the approach
requires a lot of scrambling and light climbing, it is recommended
to pack as light as possible. You will thank yourself for the
smaller pack size when you see how much you will lug it around only
to do 2 rappels.
The water rating of A (B) is due to the seasonal presence of water
flowing in the canyon. As spring warms up the accumulated snow
higher up the will be significant water flow in the canyon and over
the waterfall. As the year goes on the water flow decreases
until it finally stops. So the amount of water you find will
depend on when you go.
To get to the Trailhead
From the entrance gates to Red Rock Canyon Scenic Loop, drive
8.1 miles on the scenic loop to the Ice Box Canyon trailhead.
Park in the parking lot.
To leave the Exit Vehicle / Escape Pod
No exit vehicle is needed. This is done as a loop route.
GPS coordinate information listed at the bottom. For information about waypoint naming and map symbols, refer to the
Glossary page.

Click the links for maps of the route.
Map of the entire route.
first part of approach.
Map of the second part of approach and the technical section.
The Approach:
From the trailhead (tIce BoxCyn), follow the main hiking trail
about 0.2 miles to a trail junction (jCnectrTrl-Ice) where a
connector trail crosses over the Ice Box Canyon trail. Continue
west on the Ice Box Canyon trail for about 600 feet where you will leave the main trail
(jIce BoxLowr). Leave the trail to the right (west).
About 600 feet from the trail you
may find a path (wIceBxLwrRP-01) that leads toward the first
climb. From here you will not be traveling on the main trail. It
starts out pretty easy to follow, since there are signs of
occasional foot traffic. The terrain will get a bit steeper as you
approach the base of the mountain.
The first climb (wIceBxLwrRP-02) is a
climb / scramble up to a chimney, then up the chimney and into a
gully.
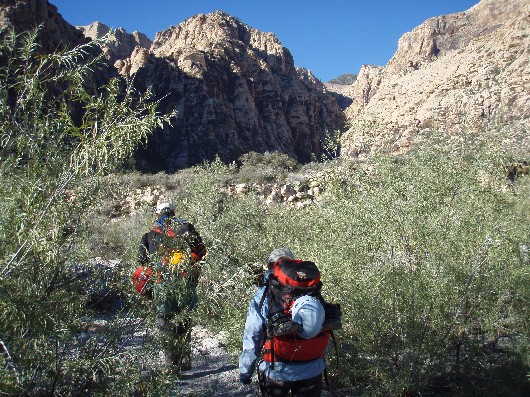
Ron and Bonnie shortly after leaving the trailhead.
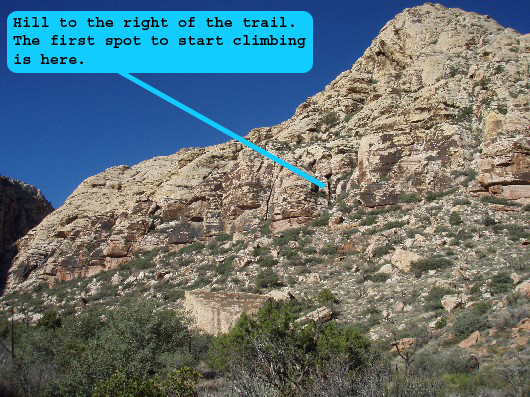 Approaching the area with the first climb.
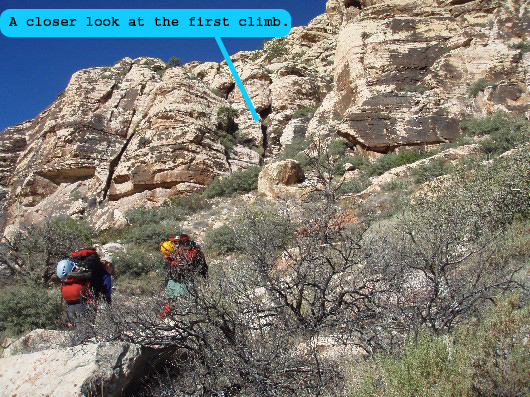 A closer look at the first climb.
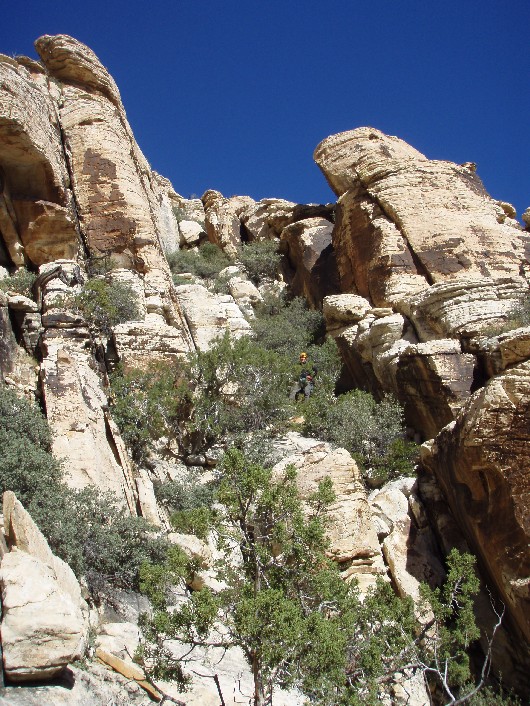
 Details of the first climb.
Once you have climbed up into the gully, continue up it for
about 60 or 70 feet to where you will climb out of the gully
(wIceBxLwrRP-03) to
your left.
Shortly after exiting up and out of the gully, make your way to
where you will be able to look left down the ridge
(wIceBxLwrRP-04) and see a
large, flat, brown black platform of rock. This platform
is not your goal. It is a land mark so you will know you
are in the right spot.
 This is a look up the gully from where you should exit the gully to the left.
This is not a section of the gully you will go up!
It is a visual queue of what it looks like in the gully above
your exit point.
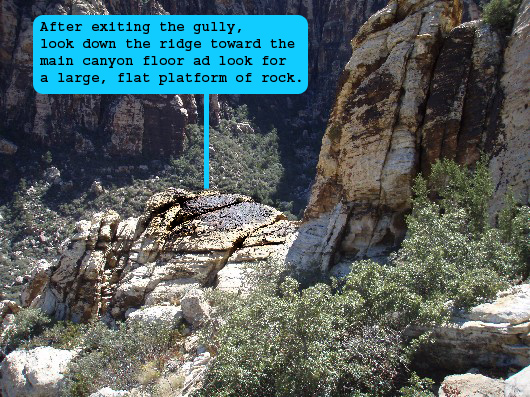 Large rock platform to look for as a landmark.
From here continue about 140 feet
to the southwest 210° to a large horn like rock (wIceBxLwrRP-05). To get
there you will need to scramble over some large boulders.
Climb between the horn and the canyon wall.
On the other side of this passage, traverse a
ledge to get to the next gully.
 A view of the horn like rock.
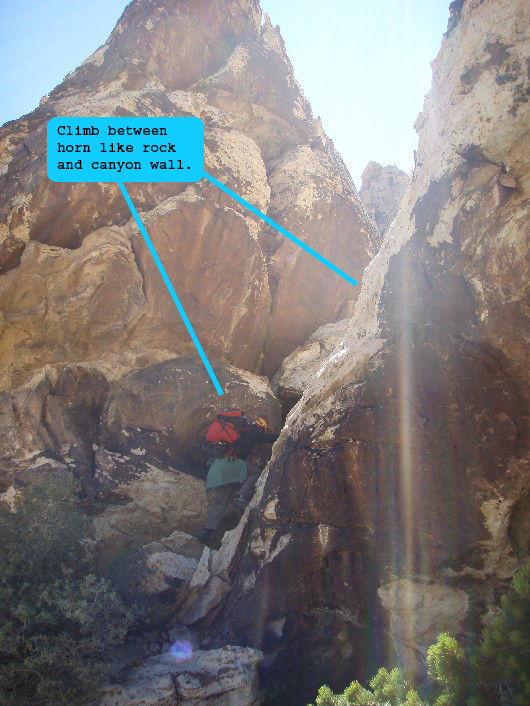 Climb between the horn like rock and the canyon wall here.
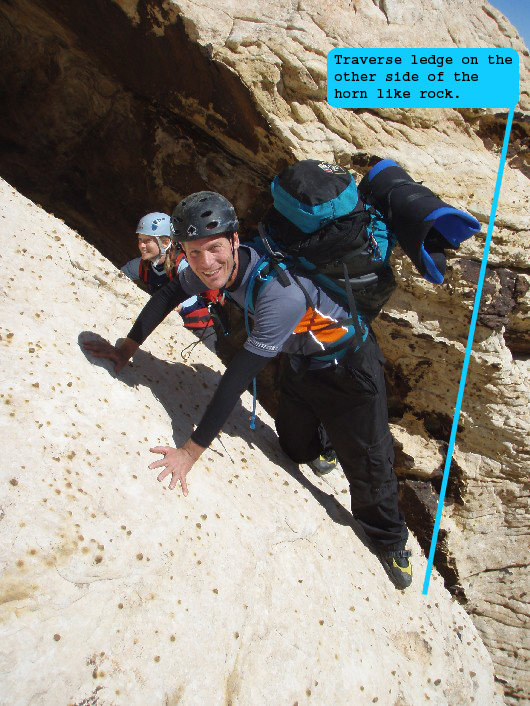 Traverse the ledge on the other side of the horn like rock.
Climb about 1,000 feet up the gully on the other side of the
horn. This gully is wide and has what appear to be gullies
that branch off of it. While climbing this gully stay on
the left side of anything that appears to be a fork. Exit
the gully (wIceBxLwrRP-06) to the left just before getting to a large dead tree.
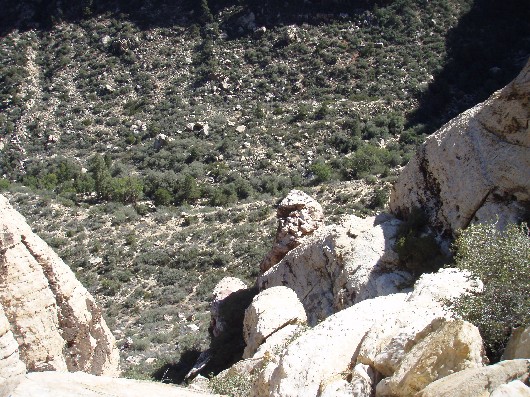 A look down the second gully (the gully after the horn like
rock).
A look down the second gully (the gully after the horn like
rock).
After traversing the ledge after the horn like rock, this is
what you will see looking down the gully you find yourself in.
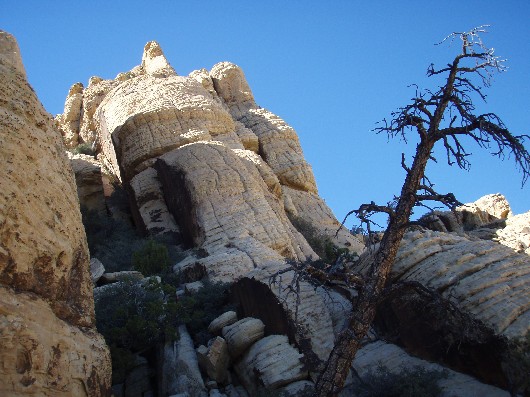 A tree just above the exit point of the second gully.
Travel up the second gully (the gully passed the horn like rock)
almost to this tree.
Remember to stay to the left at any point in this second gully
that appears to be a fork.
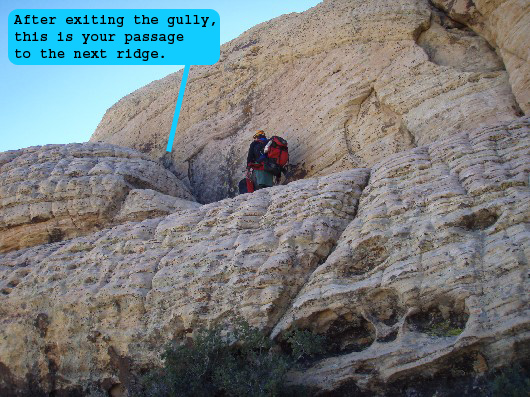 Exit point on the left side of the second gully.
Exit the gully on the left side and get out to the ridge through
here.
Climb to the crest of the ridge on the left side of the gully
(wIceBxLwrRP-07).
From the crest of the ridge continue southwest 220° about 150
feet to a short crevice or chute (wIceBxLwrRP-08) running up about 80 feet
to the
northwest.
After climbing up the chute or crevice continue southwest 227°
about 1,000 feet to the crest of the next ridge. The route
from the chute or crevice to the next ridge crest
(wIceBxLwrRP-09) is pretty easy travel. There are a couple
obstacles to climb up and over.
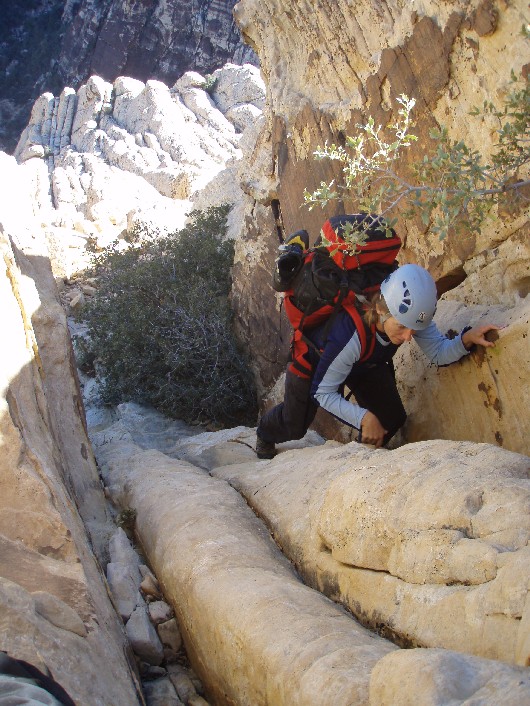 Climb the short crevice - chute.
There were cairns at top and bottom but they may not always be
around.
Just past this ridge crest is a good view of the Buffalo
Climbing Wall in the distance. Keep your eyes open to the
left, at one point along the route you get a good view down to
the big waterfall you will eventually end up at. Continue
about 500 feet to the southwest to the beginning of a large bowl
(wIceBxLwrRP-10)
you will need to hike around.
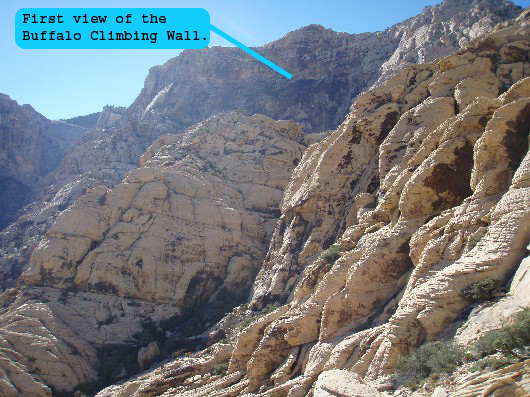 A view of the Buffalo Climbing Wall.
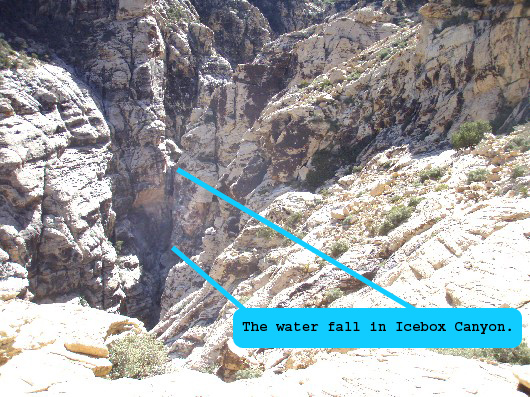 A look down to the water fall.
Go around the bowl by hiking around it to the right while trying not to lose elevation.
Just before getting to the other side of the bowl you will need
to drop into a wash (it had water when we were there in October)
then back up out of it. On the other side of the wash make
your way up to the ridge point with a large rock on it. This ridge point is the end of the bowl
(wIceBxLwrRP-11).
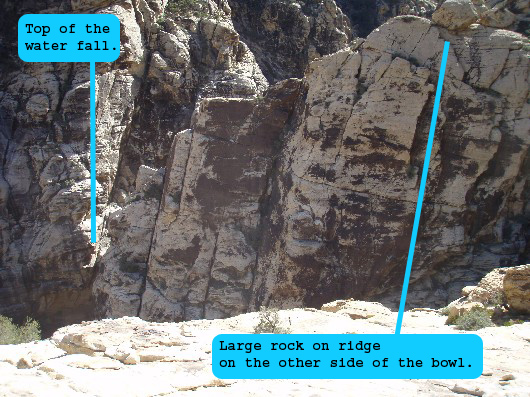 A view of the ridge on the far side of the bowl.
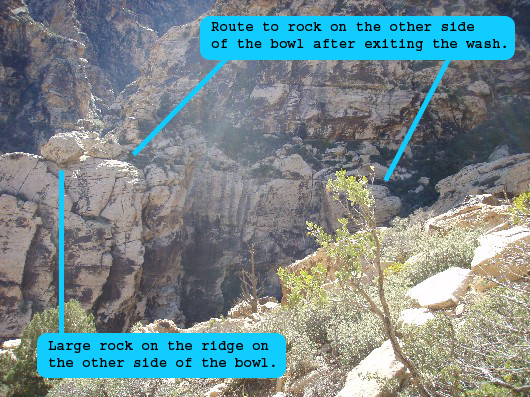 A view of the route to the ridge on the other side of the bowl.
 The wash to travel across just before reaching the other side of the bowl.
Walk a short distance around the ridge to the top of a gully
(wIceBxLwrRP-12)
going down to the left.
Work your way down the gully about 300 feet to the bottom.
It is possible to travel right down the center of the gully but
there is a lot of bushwhacking there. I traveled down the
right side of the gully with little trouble and almost no
bushwhacking.
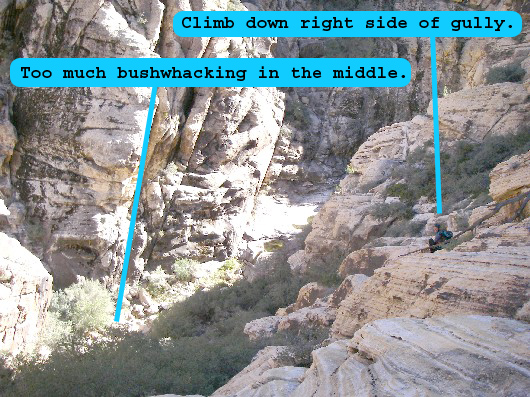 A view down the last gully to the floor of Ice Box Canyon.
The Canyon / Technical Section:
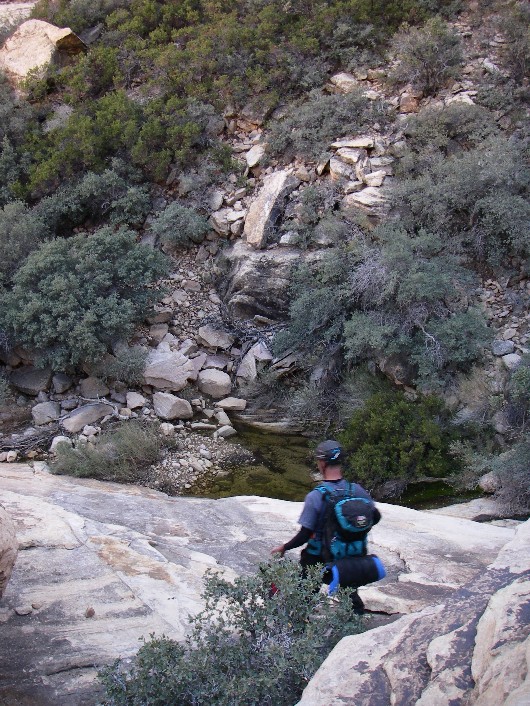
Once at the bottom of the gully
(wIceBxLwrRP-13) you are on the floor of Ice Box
Canyon about 500 feet from the top of the water fall.
Travel down the wash (east). You will quickly come to a
pool of water that stops your travel. Look right to find a
large boulder to the right. Go up and over this boulder to the
right to bypass the pool.
Just before reaching the water fall (dIce BoxR1-2) will be a
pool, which is right at the top of the water fall. The first rappel
is anchored from a tree about 40 feet up canyon and drops about 15
feet into the pool. Even with little water flow in the canyon this
pool will be a swimmer. Unless it is HOT out you will want a wet
suit on this one. On the other end of the pool are the anchors for
the second rappel down the falls.
Rap 2 is anchored from two bolts LDC in the watercourse and drops
about 160 feet over a big waterfall. This is the big waterfall that the
standard trail hikes up to the bottom of.
After raping down the water fall, hike back to the trailhead by
following the wash to a path (jTrl2WshCnct1) on the left leading up to the main
trail.
Follow the main trail about 0.8 mile back to the trailhead.
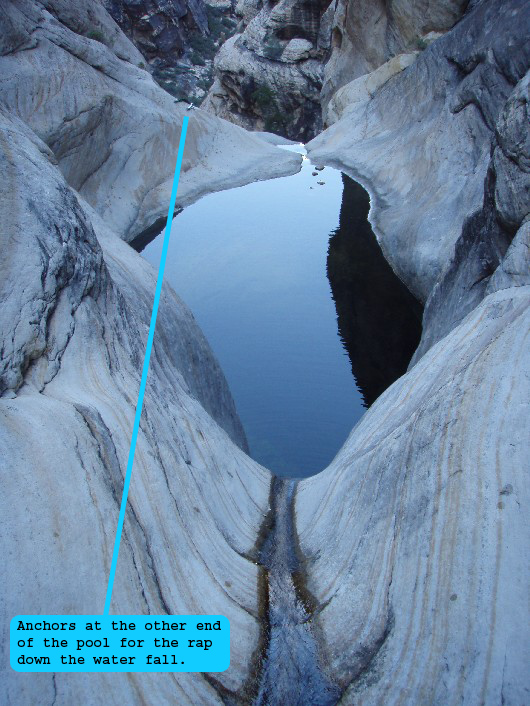 Anchors on the other side of the pool at the top of the water fall.
The second rappel is about 160’ down the falls and into a larger
pool. It is anchored from 2 bolted hangers LDC. Enjoy
this rappel since it is the reason you are doing this route.
It is a beautiful sight from the bottom looking up. If you
have ever hiked up to the water fall and looked it over from the
bottom, you may find it even more of a thrill to rap down the fall.
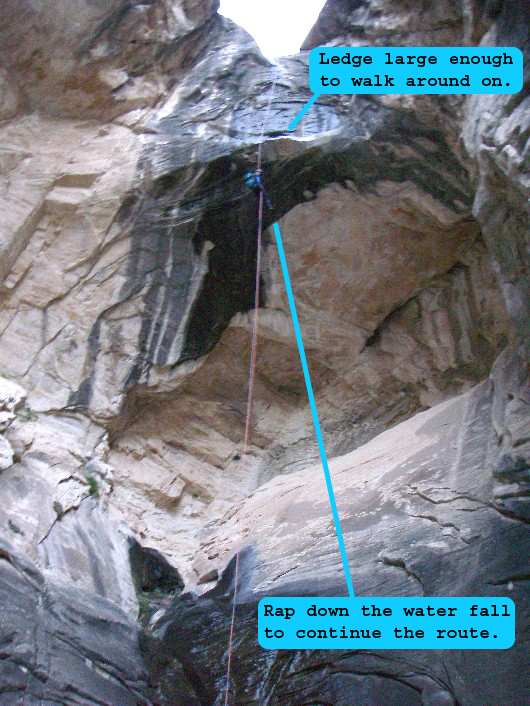
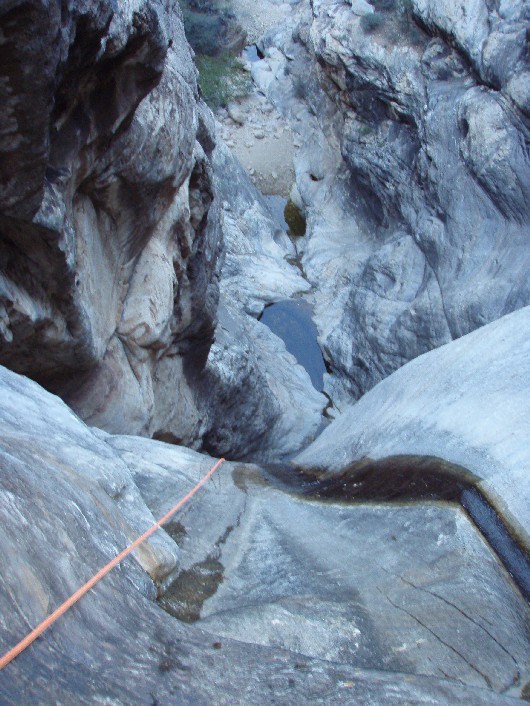 A look over the edge of the 160 foot rap down the water fall.
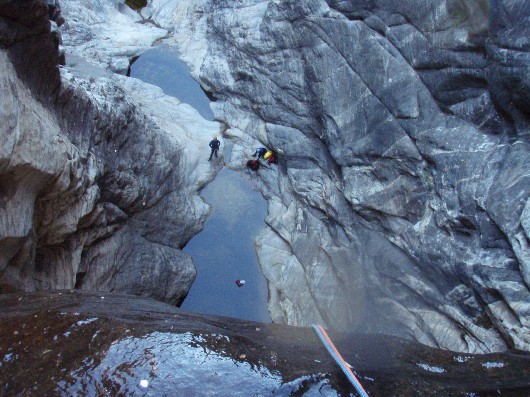 A view from the ledge pat way down the water fall.
 Rapping down the water fall.
 A look down canyon from the bottom of the rappel of the water fall.
The Exit:
After finishing the rappel down the
water fall, walk down canyon (east) following the wash. About 0.3 miles down the wash start
looking for one of a few trails that leave the main wash and take
you up the steep left (north) bank to more trails above.
Take any one of these trails heading up the steep left (north) bank
of the wash. Once on top of the banks you will be greeted with
a few trails webbing all over but all leading back to the Ice Box
trailhead.
Downloadable GPX files
available at
BG-Gear Store
(easier than manual entry and a great way to support
Bluugnome).
Waypoint naming convention and map symbol information can be found on the Glossary page.
Elevations are approximate.
BEFORE
manually entering coordinates set your system to WGS84 datum and Lat/Lon hddd.ddddd° coordinate format.
Inconsistent datum's and coordinate formats will result in location errors.
Click to show / expand the list of waypoints below........
| Icebox Lower (1) - Approach |
- tIceBoxCyn
Lat/Lon (WGS84): N 36.15007
W -115.48403
Elev: 4,290 Feet
Ice Box Canyon Trail head on the Red Rock Scenic Loop
- jCnectrTrl-Ice
Lat/Lon (WGS84): N 36.14799
W -115.48654
Elev: 4,300 Feet
A junction where a connector trail crosses over the Ice Box Canyon Trail.
- JIceBoxLowr
Lat/Lon (WGS84): N 36.14751
W -115.48820
Elev: NaN Feet
Point you leave the trail for the "Icebox The Hard Way" route to the top of Ice Box Canyon Water Fall. This is the point where the route leaves main trail and heads up the North side of the canyon.
- wIceBxLwrRP-01
Lat/Lon (WGS84): N 36.14773
W -115.49027
Elev: 4,410 Feet
The path here leads west toward the first climb on the route. It does not look frequently traveled, but is easy to follow.
- wIceBxLwrRP-02
Lat/Lon (WGS84): N 36.14767
W -115.49175
Elev: 4,650 Feet
Point where the Icebox Canyon The Hard Way route starts a climb up the canyon wall. This spot is where you must climb up a chimney into a gully.
- wIceBxLwrRP-03
Lat/Lon (WGS84): N 36.14771
W -115.49195
Elev: 4,700 Feet
After climbing a short up the gully past the chimney, climb out of the gully here to the left (southwest).
- wIceBxLwrRP-04
Lat/Lon (WGS84): N 36.14762
W -115.49212
Elev: NaN Feet
After climbing out of the gully and reaching this point, you should be able to see the large, flat, brown black platform of rock.
- wIceBxLwrRP-05
Lat/Lon (WGS84): N 36.14728
W -115.49220
Elev: NaN Feet
Large rock that looks sort of like a horn. Climb between this horn rock and the canyon wall to get to the next gully.
- wIceBxLwrRP-06
Lat/Lon (WGS84): N 36.14806
W -115.49518
Elev: 5,360 Feet
After getting past the horned rock, climb northwest up the gully you find yourself in. Climb left out of the gully above the horn rock here.
- wIceBxLwrRP-07
Lat/Lon (WGS84): N 36.14773
W -115.49512
Elev: NaN Feet
A point on the crest of the ridge after leaving the gully. This is a point on the ridge after leaving the second gully that makes the route easy to find.
- wIceBxLwrRP-08
Lat/Lon (WGS84): N 36.14746
W -115.49549
Elev: 5,350 Feet
Climb up this short crevice to continue the route. There is a short crevice about 30 feet to climb up here to continue the route. There were cairns there at one time.
- wIceBxLwrRP-09
Lat/Lon (WGS84): N 36.14552
W -115.49812
Elev: NaN Feet
This is a point on a crest of a ridge just before you get to the bowl to hike around.
- wIceBxLwrRP-10
Lat/Lon (WGS84): N 36.14457
W -115.49940
Elev: NaN Feet
Starting point of a large bowl to hike around.
- wIceBxLwrRP-11
Lat/Lon (WGS84): N 36.14342
W -115.50143
Elev: 5,240 Feet
This is the other side of the bowl you will hike around to get to the other ridge.
- wIceBxLwrRP-12
Lat/Lon (WGS84): N 36.14285
W -115.50145
Elev: NaN Feet
This is the top of the gully that drops into Icebox Canyon from the north side near the top of the falls. Follow that gully down to the floor of Icebox Canyon.
- wIceBxLwrRP-13
Lat/Lon (WGS84): N 36.14229
W -115.50127
Elev: 4,980 Feet
This is the bottom of the gully that takes you to the floor of Icebox Canyon a few hundred feet from the water fall.
|
| Icebox Lower (2) Canyon and Exit |
- wIceBxLwrRP-13
Lat/Lon (WGS84): N 36.14229
W -115.50127
Elev: 4,980 Feet
This is the bottom of the gully that takes you to the floor of Icebox Canyon a few hundred feet from the water fall.
- dIceBoxR1-2
Lat/Lon (WGS84): N 36.14283
W -115.50001
Elev: 4,890 Feet
Raps 1 and 2 for Ice Box Canyon.
Rap 1 is a 15 foot rap from a tree to a pothole that is a swimmer.
Rap 2 is on the other side of that pool with bolted anchors for rappelling the water fall with a rap length of 160 feet.
- yIceBoxBt1
Lat/Lon (WGS84): N 36.14292
W -115.49976
Elev: NaN Feet
This is the bottom of the Icebox Canyon route. This is the large water fall that is so popular on the Icebox Canyon hiking trail. From here follow the main hiking trail to get back to the trailhead. Rapping down the watter fall is 160 feet from bolted hangers.
- jTrl2WshCnct1
Lat/Lon (WGS84): N 36.14451
W -115.49549
Elev: 4,530 Feet
A connector trail that joins the main trail and the wash. The connector trail meets the main trail here.
- JIceBoxLowr
Lat/Lon (WGS84): N 36.14751
W -115.48820
Elev: NaN Feet
Point you leave the trail for the "Icebox The Hard Way" route to the top of Ice Box Canyon Water Fall. This is the point where the route leaves main trail and heads up the North side of the canyon.
- tIceBoxCyn
Lat/Lon (WGS84): N 36.15007
W -115.48403
Elev: 4,290 Feet
Ice Box Canyon Trail head on the Red Rock Scenic Loop
|